This guide describes the steps to install Tembo Self Hosted on AWS, which allows you to deploy a high-performance, fully-extensible managed Postgres service within an AWS Elastic Kubernetes Service (EKS) cluster.
Step 1: Prerequisites
Before starting this tutorial, you must install and configure the following tools and resources that you need to create and manage Tembo Self Hosted on an Amazon EKS cluster.
- Amazon EKS Cluster
- Kubernetes (kubectl)
- Amazon EKS (eksctl), used to create and manage your Tembo cluster on EKS
- Helm CLI
- Obtain a Clerk authentication key from Tembo
Step 2: Prepare for Tembo installation
Prepare Tembo helm chart installation by running a script using the command below. It does following:
- Enables IAM OIDC Provider
- Creates the Amazon EBS CSI driver IAM role
- Adds the Amazon EBS CSI driver add-on
- Update the StorageClass to allow for volume expansion
- Give Cluster Node IAM role permission to ChangeResourceRecordSets & ListResourceRecordSets for Route53
bash <(curl -s https://raw.githubusercontent.com/tembo-io/tembo-self-hosted/main/scripts/aws/eks-setup.sh)
Step 3: Install the Tembo Self Hosted Helm chart
Add Helm repo for Tembo & do an update
helm repo add tembo https://tembo-io.github.io/tembo
helm repo update
Now, create a file my-values.yaml with the following content:
global:
  baseDomain: tembo.mydomain.com
tembo:
  cpWebserver:
    env:
      - name: CLERK_SECRET_KEY
        value: <secret-key>
      - name: CLERK_WEBHOOK_SIGNING_SECRET
        value: <signing-secret>
      - name: STRIPE_SECRET_KEY
        value: <secret-key>
      - name: STRIPE_WEBHOOK_SIGNING_SECRET
        value: <signing-secret>
      - name: METRONOME_SECRET_KEY
        value: <secret-key>
The basedomain is used to access tembo ui, api, dataplane & instances provisioned so you must set that up first.
Now, let’s install the Tembo Self Hosted Helm chart in your EKS cluster:
helm install tembo tembo/tembo -f my-values.yaml -n tembo-system --create-namespace
Check the status of installation:
❯ kubectl get po
NAME                                         READY   STATUS      RESTARTS      AGE
control-plane-1                              1/1     Running     0             82m
control-plane-queue-1                        1/1     Running     0             79m
tembo-cloudnative-pg-749dcfc655-756mm        1/1     Running     0             83m
tembo-conductor-fb7878d7-tvh94               1/1     Running     0             77m
tembo-conductor-watcher-7ff9547686-6sld8     1/1     Running     0             77m
tembo-controller-57899fffc4-d4j55            1/1     Running     0             82m
tembo-cp-reconciler-76bd8777b6-z2nq8         1/1     Running     0             81m
tembo-cp-service-75bccdddbd-b8xbk            1/1     Running     0             78m
tembo-cp-webserver-686fb69bb5-w5g6g          1/1     Running     0             78m
tembo-dataplane-webserver-7f9bd5cbf7-gkk2w   1/1     Running     0             83m
tembo-init-cp-db-lxl2t                       0/1     Completed   0             83m
tembo-init-cp-queue-db-lljgr                 0/1     Completed   0             83m
tembo-label-namespace-ggnml                  0/1     Completed   0             83m
tembo-pod-init-74975dbcb8-d9jpk              1/1     Running     0             83m
tembo-tembo-ui-685ccc9996-n8tmv              1/1     Running     0             83m
Step 4: Configure DNS for Traefik’s Load Balancer
Add a wildcard DNS A record through your DNS provider. This is essential since each PostgreSQL instance has its own subdomain for its connection string.
-
Create a Wildcard A Record: Set up a wildcard CNAME record (e.g.,
*.tembo.mydomain.com). This will cover all subdomains for your PostgreSQL instances. -
Use the External IP: Point the wildcard CNAME record to the external IP of your Traefik load balancer. This external IP can be found using the command below.
kubectl get svc -n traefik
NAME      TYPE           CLUSTER-IP      EXTERNAL-IP                                                                      PORT(S)                                     AGE
traefik   LoadBalancer   10.200.50.100   abcdef1234567890abcdef1234567890-1234567890abcdef.elb.us-west-1.amazonaws.com   1234:56789/TCP,80:12345/TCP,443:23456/TCP   45m
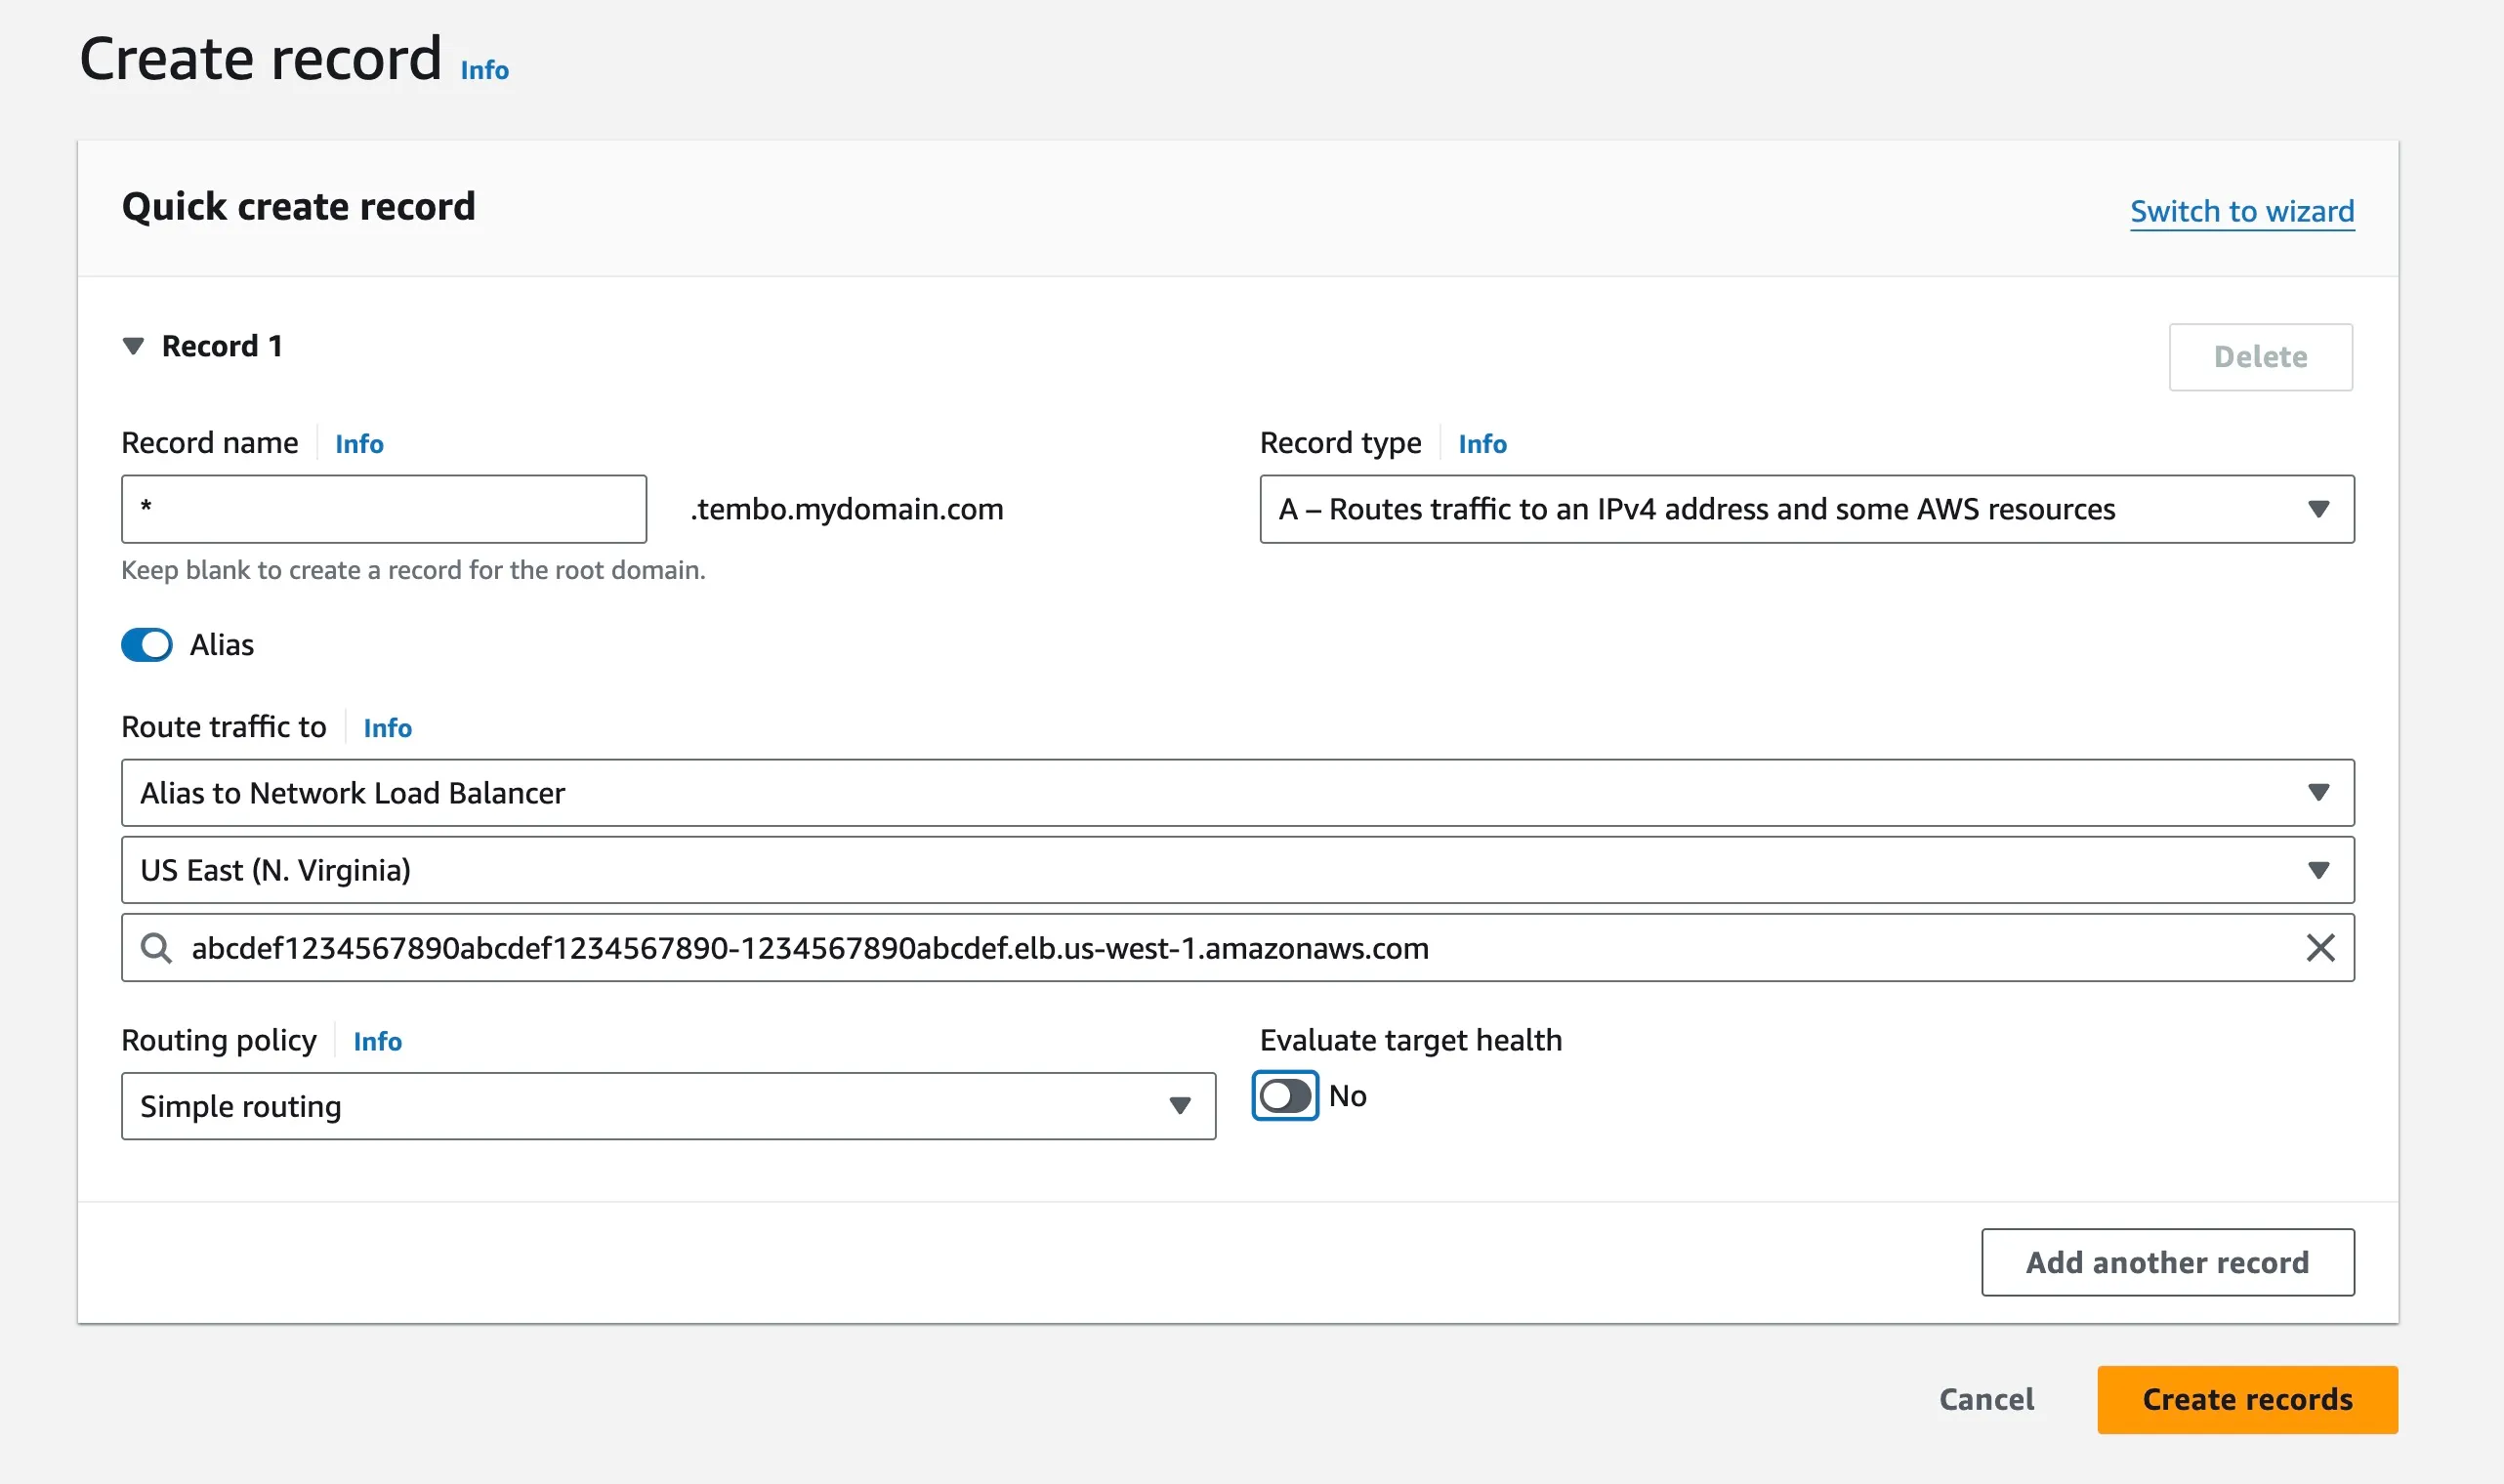
If you’re using Amazon Route 53, the configuration should look something like the image below. For more detailed information, refer to Creating Records Using the Amazon Route 53 Console.
- Verify DNS Settings: After creating the CNAME record, verify that the DNS settings are correctly propagating and resolving.
You can use nslookup to check if your DNS settings are working correctly:
nslookup test.tembo.mydomain.com
;; Got recursion not available from 2001:4860:4860::8888, trying next server
;; Got recursion not available from 2001:4860:4860::8844, trying next server
Server:		8.8.8.8
Address:	8.8.8.8#53

Non-authoritative answer:
Name:	test.tembo.mydomain.com
Address: 203.0.113.10
Name:	test.tembo.mydomain.com
Address: 203.0.113.20
Step 5: Access the Tembo Self Hosted
Access the Tembo Self Hosted UI by visiting http://app.tembo.mydomain.com in your browser. Replace tembo.mydomain.com with your domain name.
