Tembo’s Blog

Floor Drees
Head of Education
Rewarding bounties, worth it?
2 min read
Nov 20, 2024
Floor Drees
Head of Education
Work on Tembo Open Source for Fun and Profit
2 min read
Oct 17, 2024

Adam Hendel
Founding Engineer
Building a Managed Postgres Service in Rust: Part 1
8 min read
Mar 27, 2024

Adam Hendel
Founding Engineer
Application Services: Helping Postgres Do More, Faster
5 min read
Nov 1, 2023

Ian Stanton
Founding Engineer
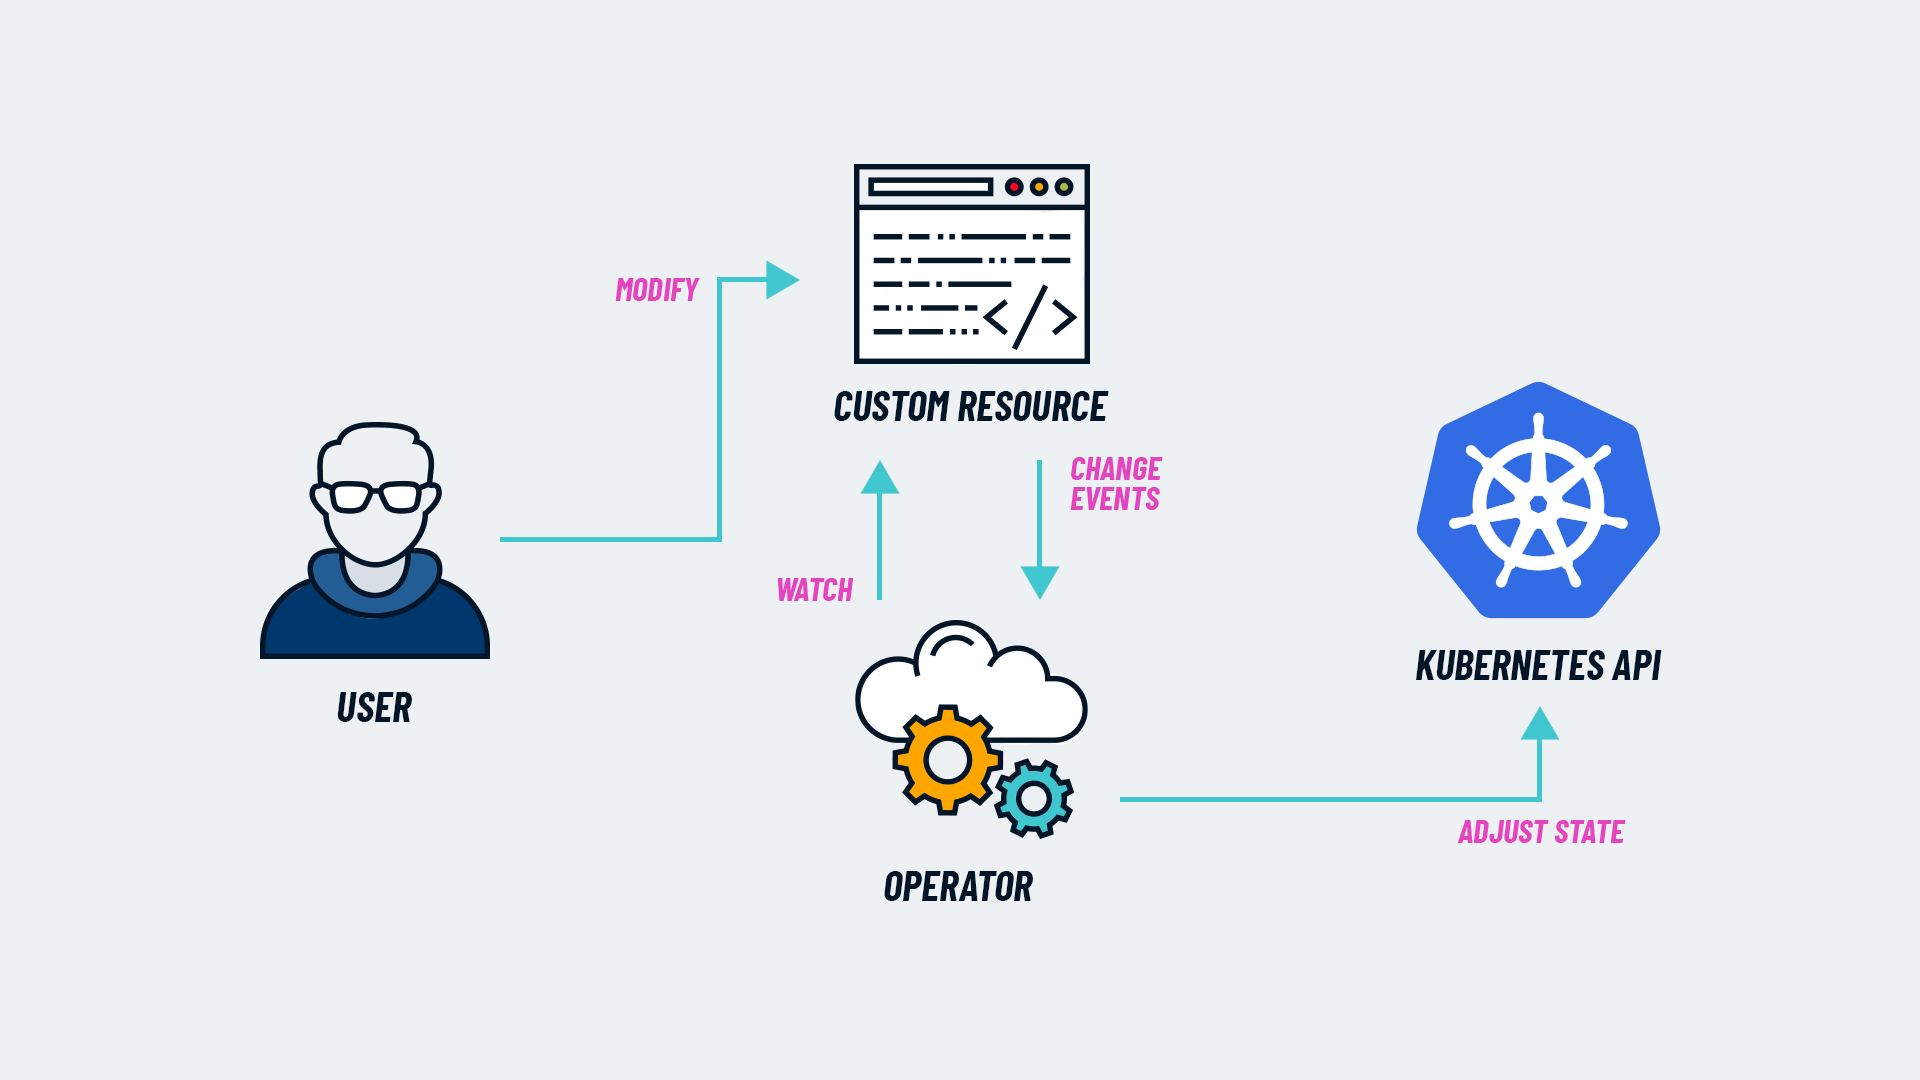
Tembo Operator: A Rust-based Kubernetes Operator for Postgres
7 min read
Oct 25, 2023

Binidxaba
Community contributor
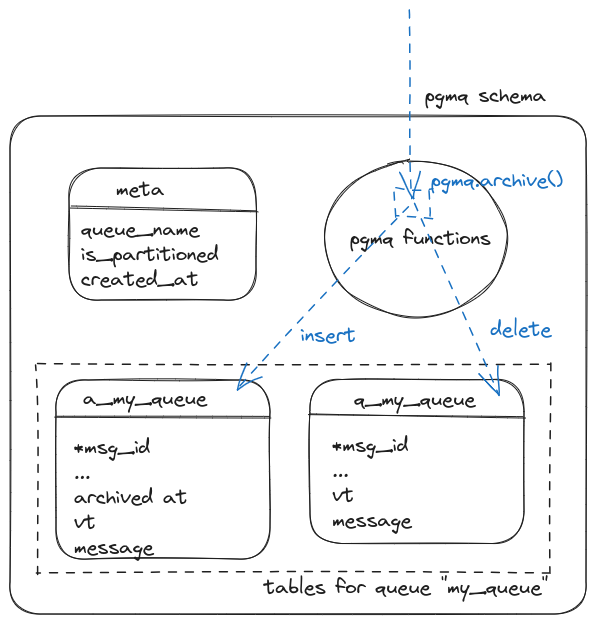
Anatomy of a Postgres extension written in Rust: pgmq
11 min read
Sep 28, 2023
